How to Add Google Tag Manager to a WordPress Site in 4 Simple Steps

Welcome to our Zen Digital Toolkit, a place where we break things down into simple, actionable steps that you can use in your daily marketing efforts.
In this series we'll guide you with practical roadmaps that will bring calm and clarity to your marketing journey. Whether you’re working on lead generation, digital campaigns, or setting up your ads, these tips will help you stay on track.
What is Google Tag Manager (GTM) and Why Is It Important?
Google Tag Manager is a free tool that allows you to manage and deploy marketing tags (like analytics tracking, pixel codes, or other snippets) on your website without needing to alter the code manually. It simplifies the process of adding, updating, and testing tracking codes, giving you greater control over how you track visitor interactions. If you’re using a WordPress site, integrating GTM means you can optimize your data collection, enabling better insights for campaign performance and user behavior, all without needing a developer for every change.
Steps for Configuring Google Tag Manager on WordPress
Step 1: Environment Setup
Before starting, make sure you are using a self-hosted WordPress site (WordPress.org) as this method won’t work on WordPress.com.
Download the Google Tag Assistant Companion (Free).
- Sign up for Google Tag Manager (Free) and
- Log in using your Google account.
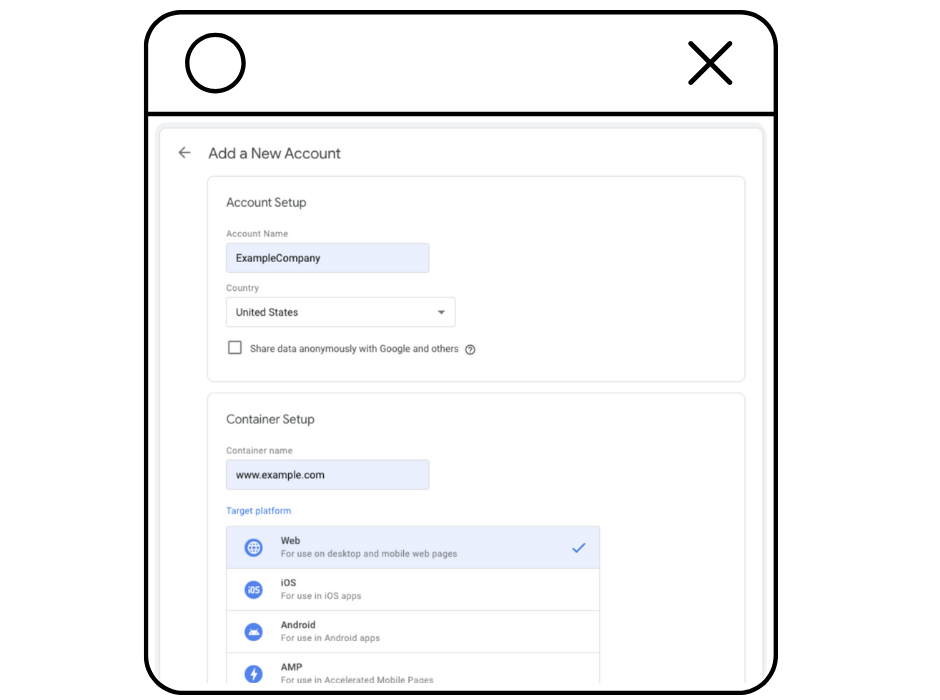
- Create a new GTM account by filling the account details:
- Account Name (something recognizable)
- Country
- Container Name (your website URL)
- Target Platform (The place where you will use Google Tag Manager e.g., website, mobile)
- (Optional) Check the box to share data anonymously with Google.
- Click Create
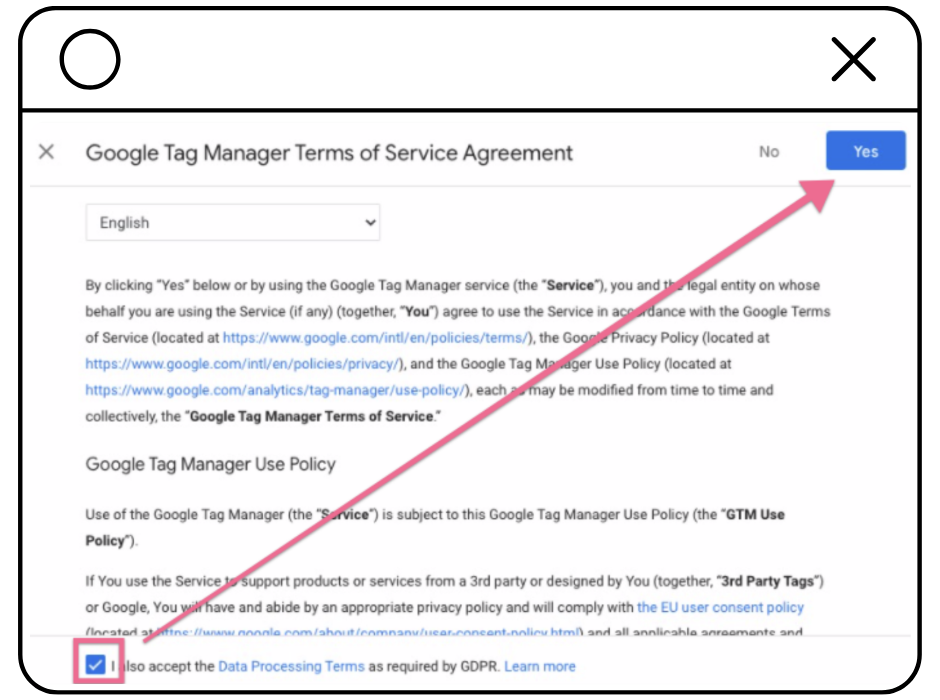
- Accept the Terms of Service
- Ignore the provided code since we won’t manually add it.
- Welcome to your Workspace
- Note your Google Tag Manager ID (e.g., GTM-XXXXXX).
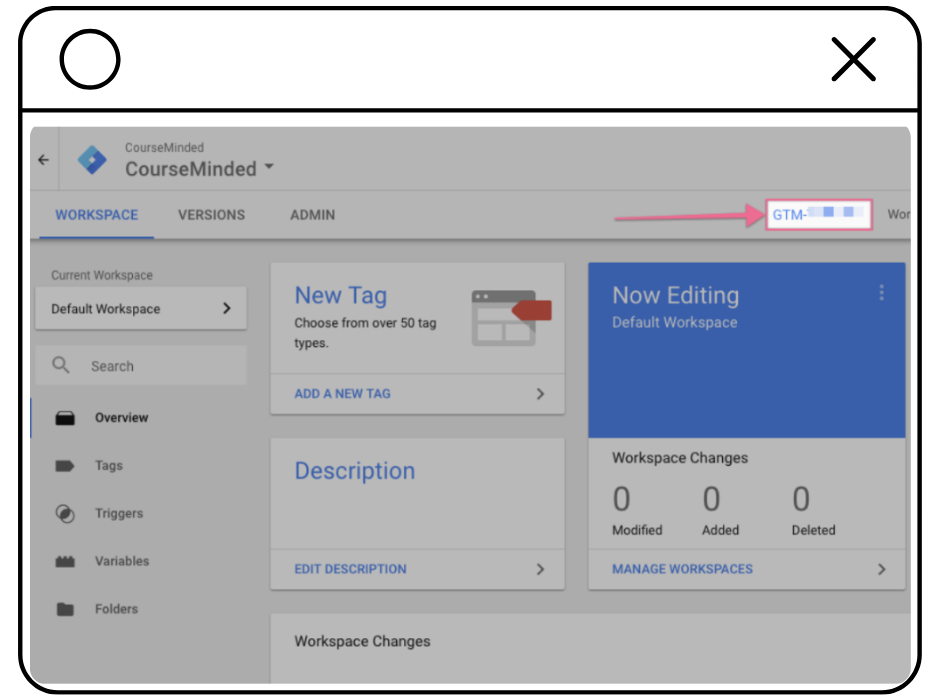
- Click Submit > Publish > Continue to publish your GTM container.
- Note your Google Tag Manager ID (e.g., GTM-XXXXXX).
Step 2: Install and Configure the Google Tag Manager WordPress Plugin
Log in to your WordPress site.
Go to Plugins > Add New.
Search for "Google Tag Manager for WordPress".
- Install the GTM4WP plugin.

-
Activate the plugin.
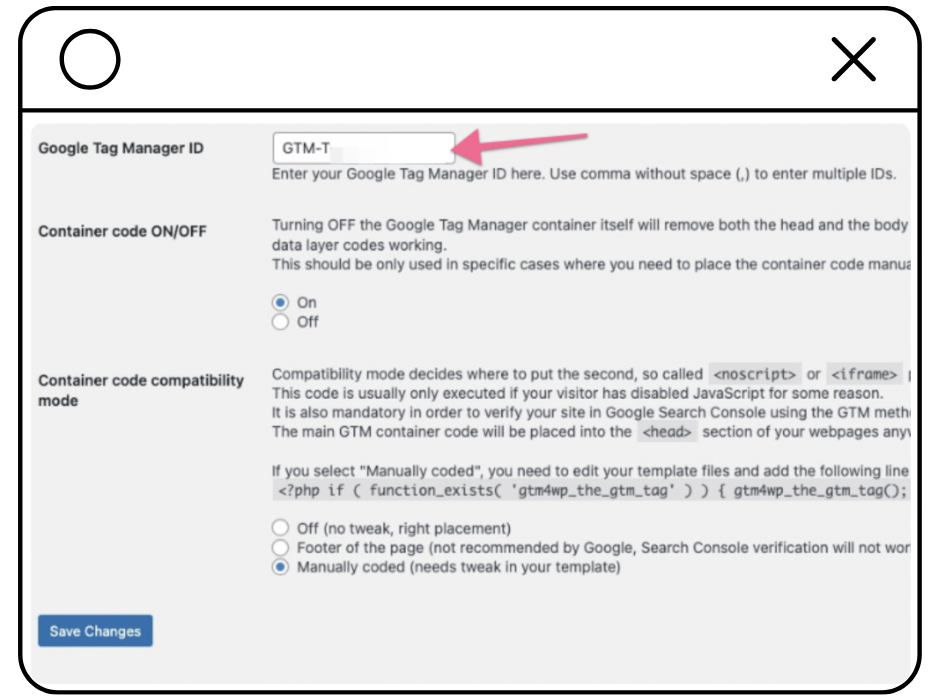
Navigate to Settings > Google Tag Manager in the sidebar.
Paste your Google Tag Manager ID (from Step 1) in the required field.
Before actually installing the plugin, we recommend you create a backup of your site.
Choose an installation option. Here, our journey parts in two ways:
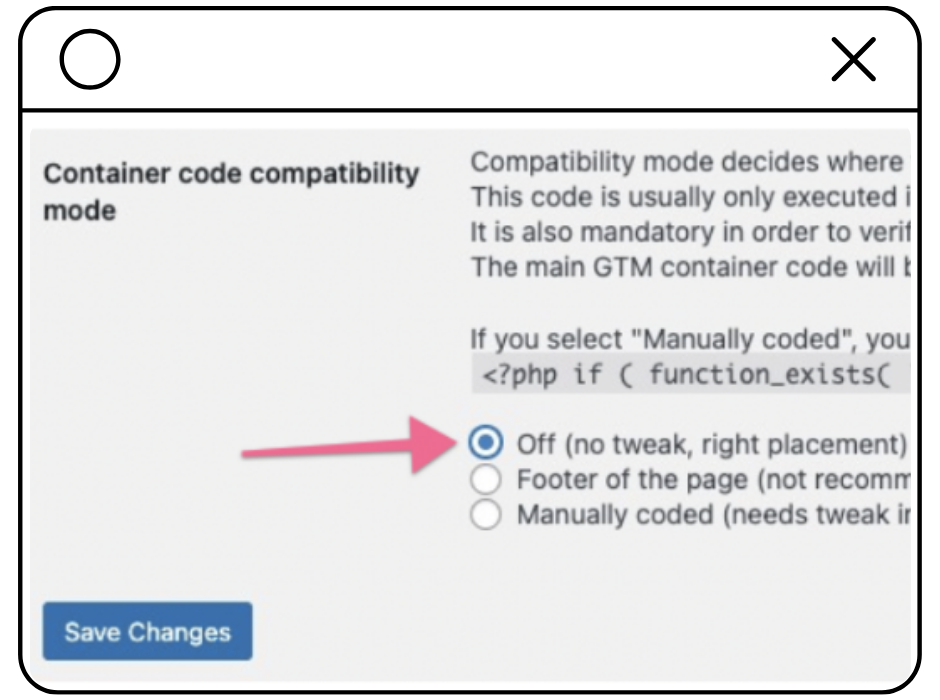
Off: Let the plugin figure out the right placement automatically. This is the easiest option, but there’s a small risk of display issues on your site. So make sure to visit your website and see if everything looks as it should. If it does, you can continue to Step 4.
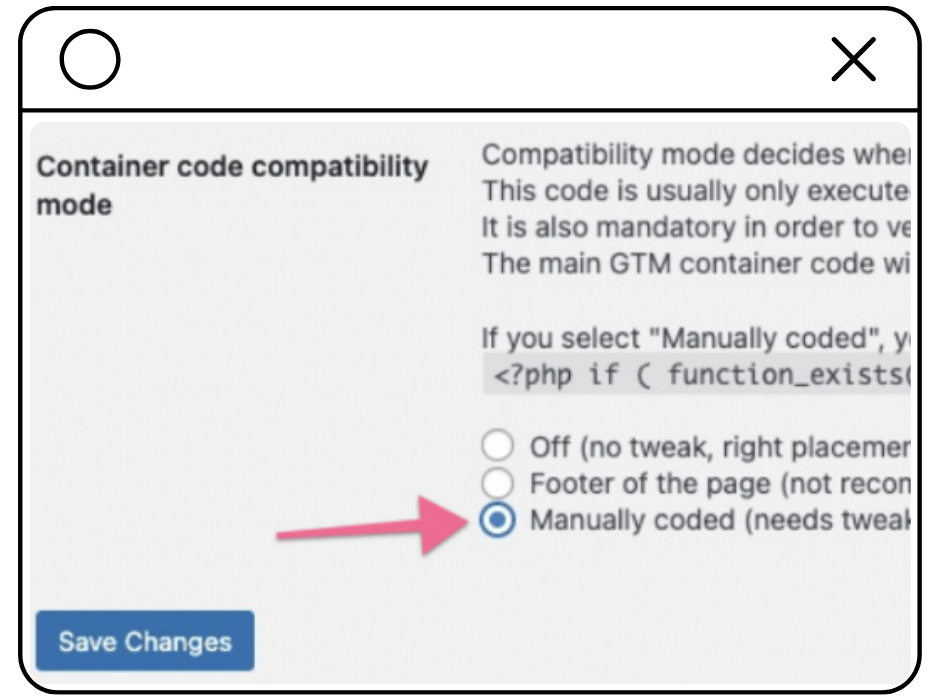
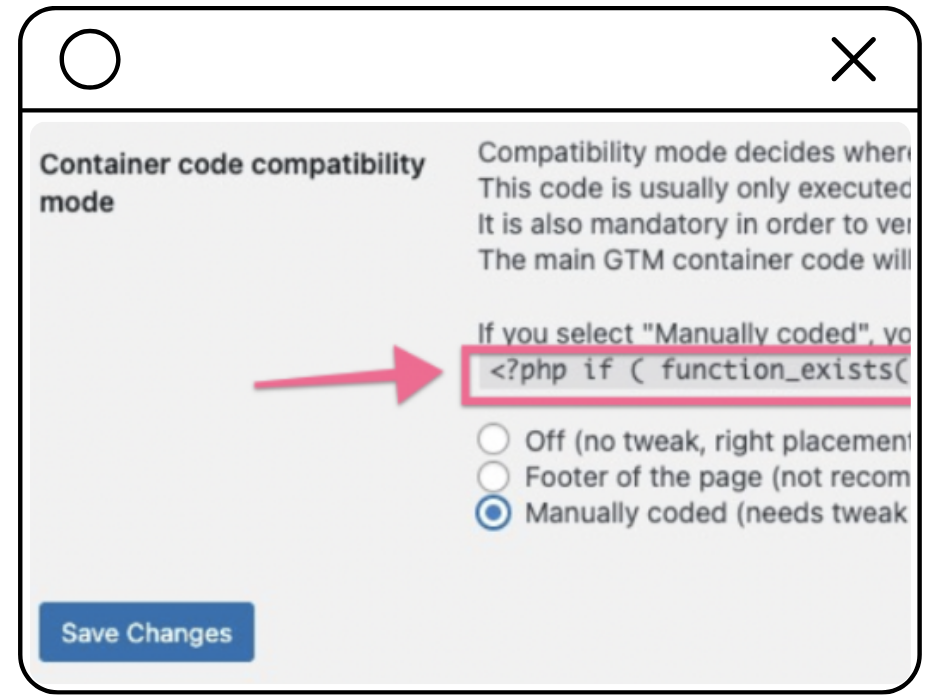
Manually Coded: If you're comfortable editing theme files, select this option. You’ll need to place the container code manually within your theme. If you choose this option, check Step 3 for further instructions.
Step 3: Manually Adding GTM Code
Copy the PHP code from the plugin.
-
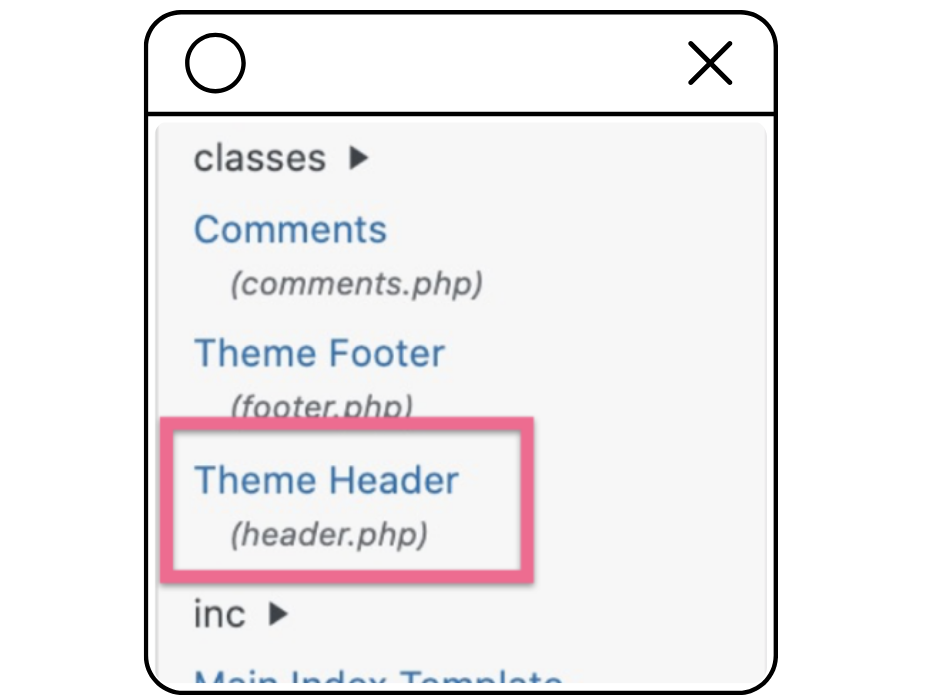
Go to Appearance > Theme Editor. Please make sure that you are editing the Theme that you currently have installed on your site (If you are not sure, you can go to Appearance > Themes to check the name of the theme you are using).
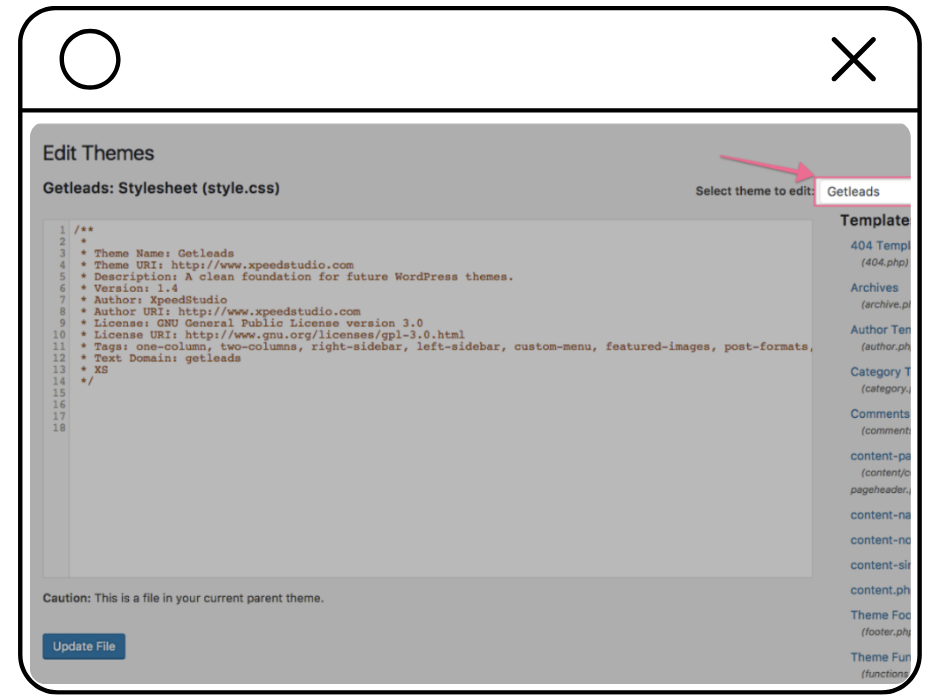
Open the Theme Header template.
Locate the <body> tag
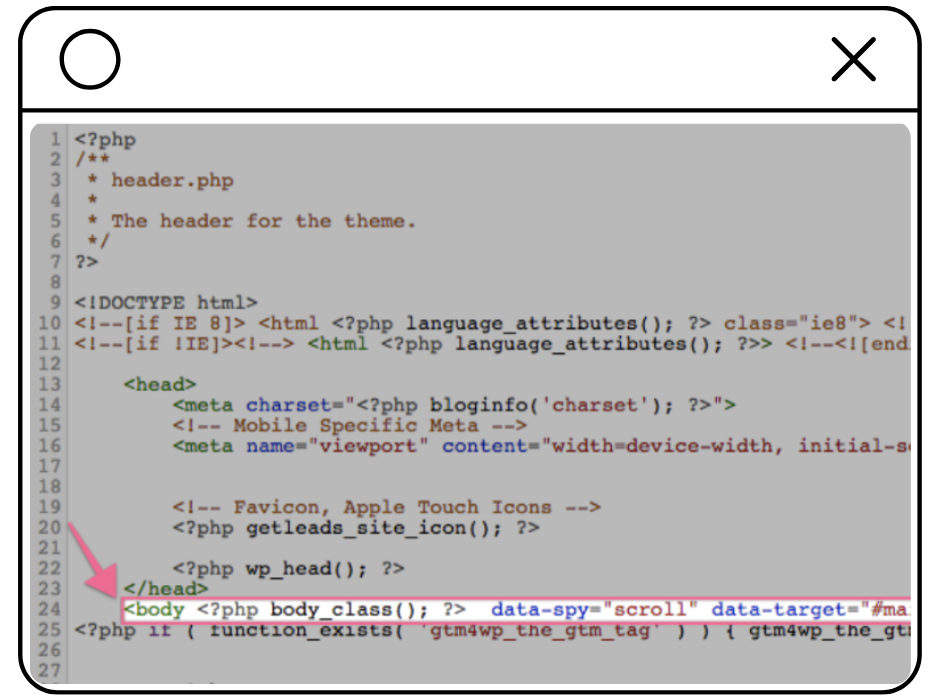
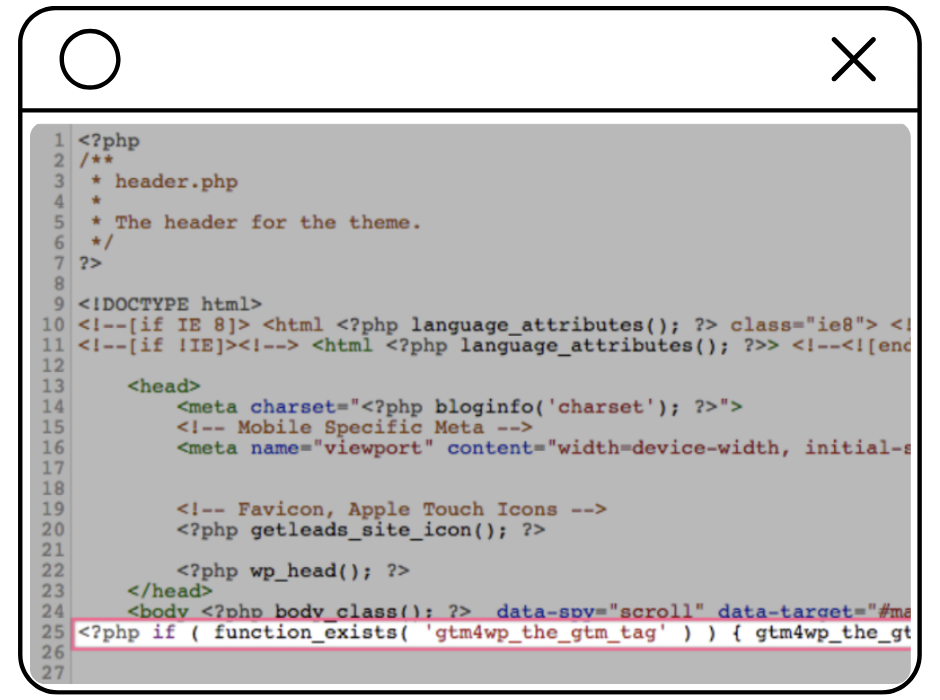
Paste the copied PHP code directly underneath it
Click Update File to save changes.
Step 4: QA Your Installation
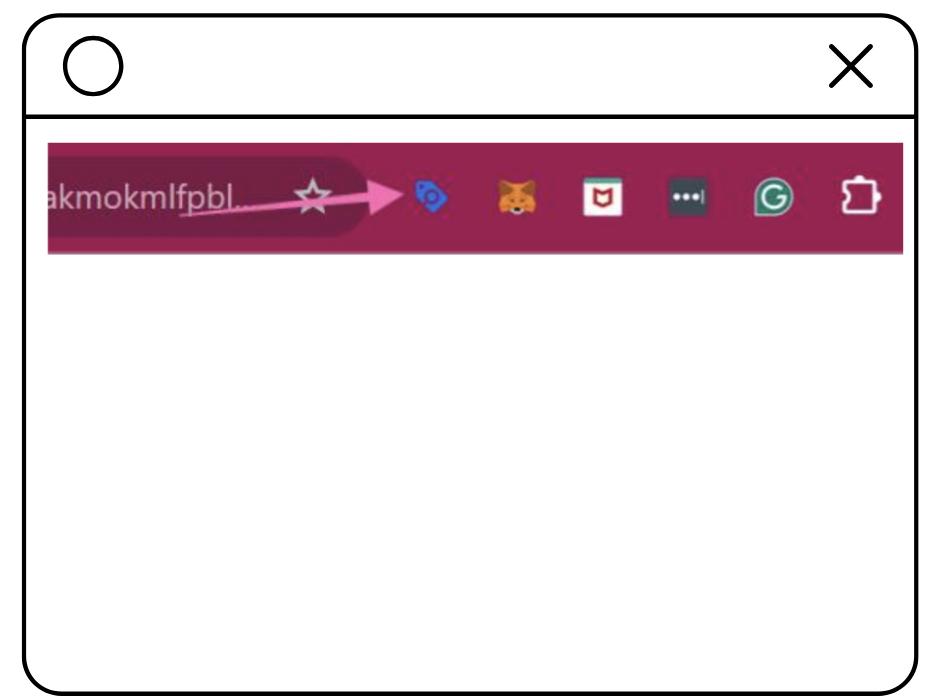
Open your website in Chrome.
-
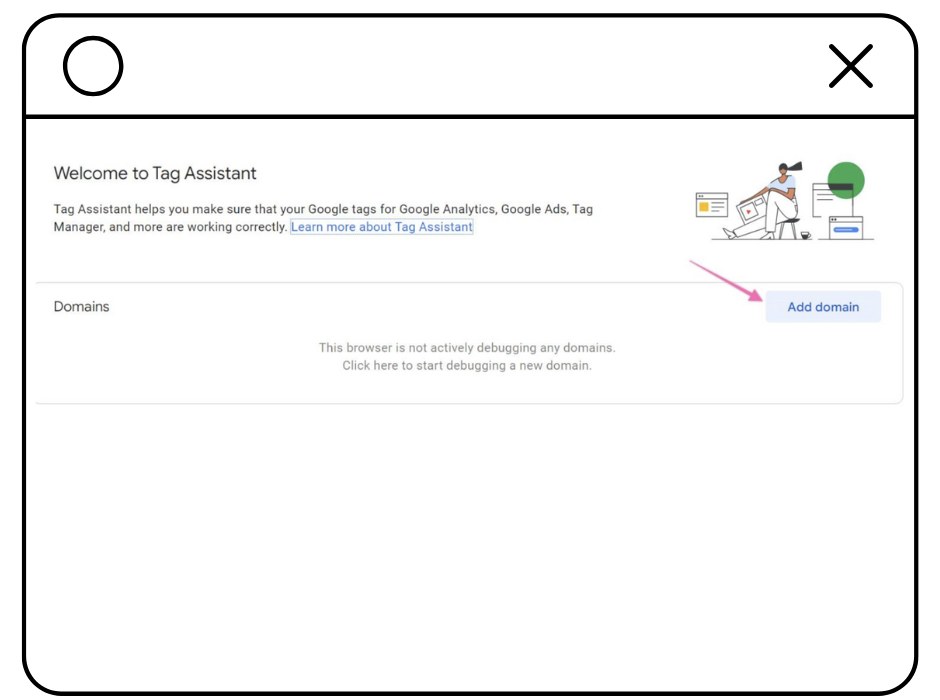
Click on the Google Tag Assistant Companion icon in your browser.
Click Add domain.
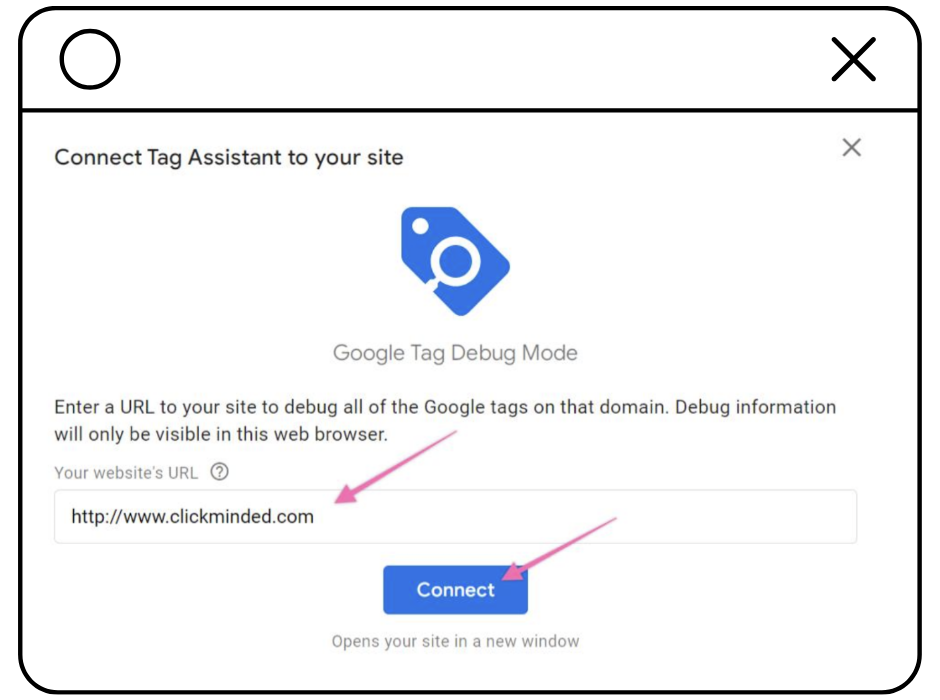
Enter your website’s URL and click Connect.
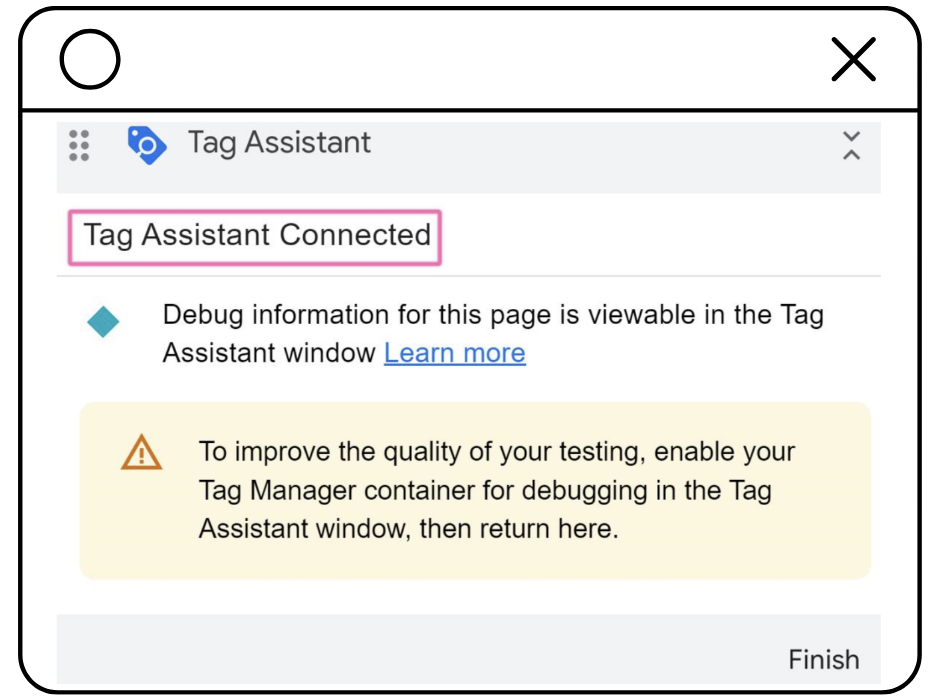
Check if the Tag Assistant is connected to your site. If connected, you’ll see a confirmation popup on your site.
That's it!
Remember, marketing success is about finding balance—between creativity and strategy, vision and execution.
Want help implementing GTM or need advice on your overall marketing strategy?
Don’t hesitate to reach out. We're here to help you simplify the complexities of digital marketing.
Read the Next Chapter

How to Add Google Tag Manager to a WordPress Site in 4 Simple Steps

How to Install a Facebook Pixel on Your Website: A Step-by-Step Guide
How to Add a Facebook Pixel to a Shopify Store in 3 Simple Steps

How to Add Google Ads Remarketing Tag to a Website with Google Tag Manager

How to Set Up a Google Business Profile in 3 Simple Steps

How to Optimize a Google Business Profile Listing in 3 Steps

How to Advertise on Google Maps

How to set up TikTok Ads manager account in 3 steps
How to Pick the Right Bid Strategy for Your TikTok Campaign